As I read through the paper, the UI that popped up on my mind is Wii U. Since I have not personally interacted with many tangible UIs, it’s hard to recall and relate to examples when I try to apply the framework provided in the paper. However, I really like the simple, two-axes taxonomy provided in the paper to help us better classify, understand, and observe the field of Tangible UIs. The Will U offers an interactive gaming experiences where the controller/joystick can acts as multiple objects when paired up with sensors that detect the movement of the users and the position of the controller. The controller can act as tennis racket or table tennis paddled or baseball bat. To apply the metaphor, the controller X can become multiple Xs in different settings. Also, the controller can perform actions that simulate Xing in real world. Will U offers both verb and noun metaphors. To apply embodiment, Wii U qualifies as a distant embodiment since it’s similar to the example given in the paper where a controller interacts with television. The framework is a useful starting point to start analyzing the interaction provided by tangible UIs, however, it doesn’t cover the nature of the interaction in depth such as the input intensity or different types of output responses. It focuses more on the relationship between the user and the UI and lacks analysis on the experience itself. If I were to modify the taxonomy, I would probably work on coming up with ways to categorize or relate different types of input/output that can fit into the metaphor/embodiment framework.
Author: Daniel Wei-Hsuan Chen
Lab 2 – Tree, LED, and Arduino
For this assignment, I used a miniature tree as the diffuser. I place all three LEDs onto the miniature tree while using leaves as background. I’ve taken the cross-fading code and added some personal flavor to it. By allowing the user to control the blue color while alternating the speed of fading through out the loops. There are a total of three different fading stages with varying speed. The outcome is not as ideal as some other types of diffuser that will actually allow you to see the fading and the mixing of colors. But I wanted to see how the LED lights would look on a miniature tree and see if it can resemble a christmas tree.
Components:
- Arduino Uno
- Breadboard
- 3 LEDs (rgb)
- 3 220Ω Resistors
- jumper wires
- USB cable
- laptop
Code:
/*

* Code for cross-fading 3 LEDs, red, green and blue, or one tri-color LED, using PWM

* The program cross-fades slowly from red to green, green to blue, and blue to red

* The debugging code assumes Arduino 0004, as it uses the new Serial.begin()-style functions

* Clay Shirky

*/
char b_input[100];

int b_value = 0;
// Output

int redPin   = 11;   // Red LED,   connected to digital pin 11

int greenPin = 9;  // Green LED, connected to digital pin 9

int bluePin  = 10;  // Blue LED,  connected to digital pin 10
// Program variables

int redVal   = 255; // Variables to store the values to send to the pins

int greenVal = 255;   // Initial values are Red full, Green and Blue off

int blueVal  = 120;
int i = 0;     // Loop counter

int wait = 50; // 50ms (.05 second) delay; shorten for faster fades

int DEBUG = 1; // DEBUG counter; if set to 1, will write values back via serial
void setup()

{

  pinMode(redPin,   OUTPUT);   // sets the pins as output

  pinMode(greenPin, OUTPUT);

  pinMode(bluePin,  OUTPUT);         // If we want to see the pin values for debugging...

    Serial.begin(9600);  // ...set up the serial ouput on 0004 style

    Serial.println("just continue to send me b");
}
// Main program

void loop()

{

  i += 20;      // Increment counter

  if (i < 255) // First phase of fades
  {
    greenVal += 1; // Green up
    redVal   = 1; // Red low
    blueVal += 1; // Blue up
  }
  else if (i < 509) // Second phase of fades
  {
    greenVal -= 5; // Green down
    redVal  += 5; // red up
    blueVal -= 5; // Blue up
  }
  else if (i < 763) // Third phase of fades
  {
    greenVal = 10; // Green low
    redVal -= 10; // Red down
    blueVal += 10; // Blue up
  }
  else // Re-set the counter, and start the fades again
  {
    i = 1;
  }
  memset(b_input, 0, 100);

  readSerialString(b_input);

  if(b_input[0] == 'b'){
    b_value = b_value + 1;
    Serial.println(b_value);
  }
  if (b_value == 13) {
    b_value = 0;
  }

  analogWrite(redPin,   redVal);   // Write current values to LED pins
  analogWrite(greenPin, greenVal);
  analogWrite(bluePin,  blueVal + b_value*20);

//  if (DEBUG) { // If we want to read the output
//    DEBUG += 1;     // Increment the DEBUG counter
//    if (DEBUG > 10) // Print every 10 loops

//    {

//      DEBUG = 1;     // Reset the counter

//

//      Serial.print(i);       // Serial commands in 0004 style

//      Serial.print("\t");    // Print a tab

//      Serial.print("R:");    // Indicate that output is red value

//      Serial.print(redVal);  // Print red value

//      Serial.print("\t");    // Print a tab

//      Serial.print("G:");    // Repeat for green and blue...

//      Serial.print(greenVal);

//      Serial.print("\t");

//      Serial.print("B:");

//      Serial.println(blueVal); // println, to end with a carriage return

//    }

//  }

  delay(wait); // Pause for 'wait' milliseconds before resuming the loop

}
void readSerialString (char *strArray) {

  int i = 0;

  if(!Serial.available()) {

    return;

  }

  while (Serial.available()) {

    strArray[i] = Serial.read();

    //Serial.print(strArray);

    i++;

  }

}
Video:
The Shift Towards Natural Body Movement
Lab1 – LED Lights & Arduino
- 1 Arduino
- 3 LED (Red, Blue, Green)
- 3 Resistor (220Ω)
- 1 Breadboard
- 2 black wires for ground
- 5 orange wires for the inputs
Code

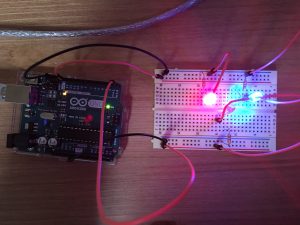
Both Red and Blue lights turning on

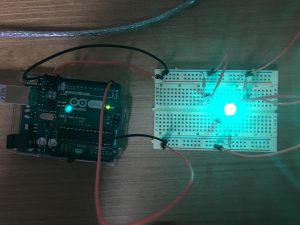
Green LED lights on

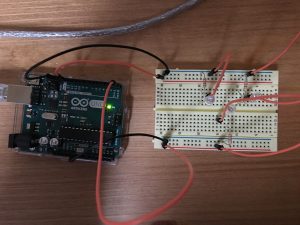
All lights off
