Electricity Usage & Ambient Media

Artist Natalie Jeremijenko created the “Dangling String” which I found to be an interesting concept expressed in a unique and artistic fashion. The part I found most fascinating was how the artist made something that’s traditionally invisible, visible. This led me to think about how to surface other invisible facets in our lives.

I think that a real time display of one’s electricity usage would be useful and could also be displayed in a non-intrusive and aesthetically pleasing manner. For example, homeowners, corporations and those trying to live a more eco-friendly life are typically concerned with their monthly electricity bills. One way to monitor it more efficiently would be to have a visual and dynamic display of its usage. Similar to the “Dangling String,” the display would need be a clam technology, traversing seamlessly from one’s periphery, to their center of attention and back again. This way, the user is subtly aware of their electricity usage, their impact on the environment, and they may even be motivated to make changes.

I think it’s also important to note that typically, electricity usage is monitored and read from a box located outside of one’s home or building. The information is displayed using indexical signage and generally, it’s rare for someone to spend time interpreting the data. Instead, most people receive a monthly bill without fully understanding the scope and breadth of their electricity usage. By bringing this invisible item first into one’s periphery and then into the center of one’s attention, this display could influence change and enable people to monitor and improve their electricity usage.

Controlling LEDs with potentiometers

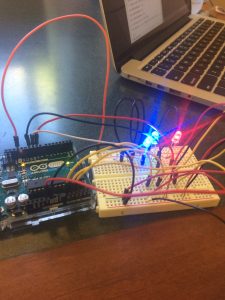
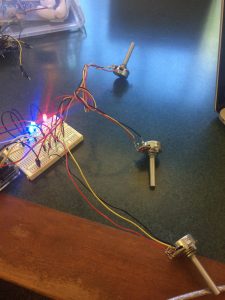
For this assignment, I used an Arduino Uno to control the brightness of three different colored LEDs using three separate potentiometers.

Components:

  • Arduino board
  • Breadboard
  • 3 potentiometers
  • 3 different colored LEDs (red, green, blue)
  • 3 ohm resistors
  • 12 wires

Extra:

I used one potentiometer to control the turning on and off of the three LEDs in sequential order.

/* POT to LED test -> by Owen Mundy March 11, 2010
 from: http://itp.nyu.edu/physcomp/Labs/AnalogIn
—————————————————————*/

// Analog input pin that the potentiometer is attached to 
int potPinBlue = A0; 
int potPinRed = A1;
int potPinGreen = A2;
// value read from the pot
int potValueBlue = 0;
int potValueRed = 0;
int potValueGreen = 0; 
// setting pins to the LEDs
int Blueled = 9; // PWM pin that the LED is on. n.b. PWM 0 is on digital pin 9
int Redled = 10; // PWM pin that the LED is on. n.b. PWM 0 is on digital pin 10
int Greenled = 11; // PWM pin that the LED is on. n.b. PWM 0 is on digital pin 11
 
void setup() {
 // initialize serial communications at 9600 bps:
 Serial.begin(9600);
 // declare the led pin as an output:
 pinMode(Blueled, OUTPUT);
 pinMode(Redled, OUTPUT);
 pinMode(Greenled, OUTPUT);
}
 
void loop() {
 potValueBlue = analogRead(potPinRed);
 potValueRed = analogRead(potPinGreen);
 potValueGreen = analogRead(potPinBlue); // read the pot value
 // turning pins on
 analogWrite(Blueled, potValueBlue/4); // PWM the LED with the pot value (divided by 4 to fit in a byte)
 analogWrite(Redled, potValueRed/4);
 analogWrite(Greenled, potValueGreen/4); 
 delay(10); // wait 10 milliseconds before the next loop
}

Extra:

byte ledPin[] = {2, 3, 4, 5, 6, 7, 8, 9, 10, 11, 12, 13}; //pins used for LED's
int potPin = 0; // analog pin used to connect the potentiometer
int val; // variable to read the value from the analog pin

void setup()
{
 for(int i = 0; i < 13; i++){ 
 pinMode(ledPin[i],OUTPUT);
 } 
 
}

void loop()
{
val = analogRead(potPin); // reads the value of the potentiometer (value between 0 and 1023)
 for (int i = 0; i < 13; i++) {
 if((i * 102) > val) { digitalWrite(ledPin[i], HIGH);}
 else
 { digitalWrite(ledPin[i], LOW);}
 }
}

IMG_7396 IMG_7397

Video of me controlling LED brightness

Extra video: Sequential LEDs

iPods; leading the way to modern day TUIs

A definition typically requires a narrow focus and a precise description. However, Fishkin takes the opposite approach in his attempt to define tangible user interfaces. Perhaps part of the challenge in narrowing the scope of TUIs begins with the first word of the acronym. He calls the word “tangible” “a multi-valued attribute” (Fishkin, 348) and, in an attempt to improve the TUI’s broad definition, he developed a taxonomy with two axes.

Throughout Fishkin’s article, I thought about various TUIs and realized that most of what existed when this article was published were either art forms or items of practical use; nothing stuck out to me as an everyday, useful, and enjoyable product. While a TV remote is incredibly useful, it’s only relevant when you’re watching TV. Most of his other examples attempted to bridge the gap between motion and engaging some aspect of our senses (i.e. movement and increasing a sound or a situation where rotation changes what one sees on a display like in the Great Dome example).

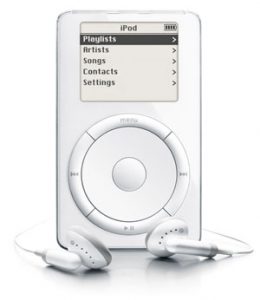
When I think of a TUI, I think of something that’s useful and practical in our everyday lives. While this use case may not have always been true, I believe the start of these practical and enjoyable TUIs began with products like MP3 players which first debuted in 1997. Although they may now seem outdated, MP3 players and iPods were revolutionary. They allowed a person to scroll through a digital library of their music using just their finger, creating what I believe to be a pure and useful TUI.

I think Fishkin’s taxonomy was helpful as it described the wide landscape of TUIs and the various environments they fit in. However, I felt that each category within embodiment could be adjusted to include just about any useful tangible object. Because the category is so large, it seems as though almost any item from our current environment has a home on the list. In order to improve this, I think narrowing the scope of what can be included within the embodiment axes of a TUIs taxonomy would be helpful.

With regards to metaphors, I agree with Fishkin’s argument that “once parts of an interface are made physically tangible, a whole realm of physically afforded metaphors becomes available (Fishkin, 349). He also goes on a define a metaphor, in a TUI sense, with the precision required of a definition. There’s no ambiguity about what could be classified as a metaphor (when referring to TUIs); there’s a clear “yes” or “no” response to whether “a system effect of a user action [is] analogous to the real-world effect…”(Fishkin 349). This axes and definition helps to narrow the scope of the wide-ranging world of tangible user interfaces.


ipod

source: https://goo.gl/images/C2OUlI

Creating My Own Mini Glacier

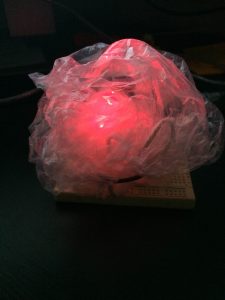
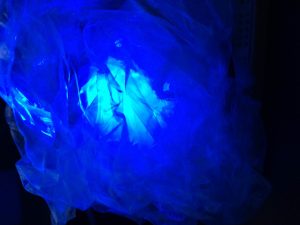
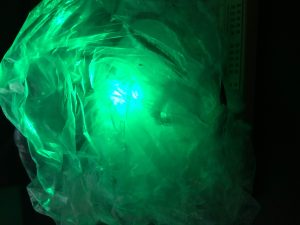
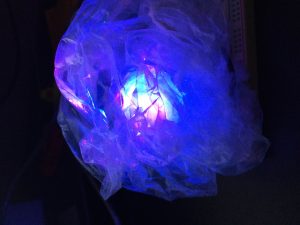
For this project, I attempted to recreate the glaciers I saw on a recent trip to Iceland. The jagged edges of the ice coupled with the pure blue color was an image that I’ll never forget and wanted to replicate. I used an Arduino board and 3 LEDs – Red, Green, and Blue – and I used a plastic shower cap to diffuse the light. Using specific keystrokes I was able to control the intensity of each of the LED’s brightness. For example, by pressing capital “R”, “G”, or “B” would result in the corresponding LED to increase it’s brightness by 50. If the lowercase letter was pressed, the intensity would increase by 15.

Components:

  1. Adruino board
  2. Breadboard
  3. 3 LEDs (red, green, blue)
  4. 3 ohm resistors
  5. 4 wires
  6. 1 plastic shower cap


Code:

char serInString[100]; // array that will hold the different bytes of the string. 100=100characters;
// -> you must state how long the array will be else it won’t work properly
char colorCode;
int colorVal;
int redVal;
int greenVal;
int blueVal;
int redPin = 9; // Red LED, connected to digital pin 9
int greenPin = 10; // Green LED, connected to digital pin 10
int bluePin = 11; // Blue LED, connected to digital pin 11
void setup() {
pinMode(redPin, OUTPUT); // sets the pins as output
pinMode(greenPin, OUTPUT);
pinMode(bluePin, OUTPUT);
Serial.begin(9600);
analogWrite(redPin, 127); // set them all mid-brightness
analogWrite(greenPin, 127); // set them all mid-brightness
analogWrite(bluePin, 127); // set them all mid-brightness
Serial.println(“enter color command using r’s, b’s, g’s, R’s, B’s, and G’s (e.g. ‘rrrrrrggggg’ ‘RRBBGG’ RRRRR’) :”);
}
void loop () {
// clear the string
memset(serInString, 0, 100);
//read the serial port and create a string out of what you read
readSerialString(serInString);
// initialize all back to zero for each loop
redVal = 0;
greenVal = 0;
blueVal = 0;
colorCode = serInString[0];
if( colorCode == ‘r’ || colorCode == ‘g’ || colorCode == ‘b’ || colorCode == ‘R’ || colorCode == ‘G’ || colorCode == ‘B’) {
// increment each color based on number of each letter
for (int i = 0; i < strlen(serInString); i++) {
switch(serInString[i]) {
case ‘r’:
redVal += 15;
break;
case ‘g’:
greenVal += 15;
break;
case ‘b’:
blueVal += 15;
break;
case ‘R’:
redVal += 50;
break;
case ‘G’:
greenVal += 50;
break;
case ‘B’:
blueVal += 50;
}
}
Serial.print(“Setting color “);
Serial.println();
Serial.print(“red to “);
Serial.print(redVal);
Serial.println();
Serial.print(“green to “);
Serial.print(greenVal);
Serial.println();
Serial.print(“blue to “);
Serial.print(blueVal);
Serial.println();
serInString[0] = 0; // indicates we’ve used this string
analogWrite(redPin, redVal);
analogWrite(greenPin, greenVal);
analogWrite(bluePin, blueVal);
}
delay(100); // wait a bit, for serial data
}
//read a string from the serial and store it in an array
//you must supply the array variable
void readSerialString (char *strArray) {
int i = 0;
if(!Serial.available()) {
return;
}
while (Serial.available()) {
strArray[i] = Serial.read();
i++;
}
}


DSC_0411

Below an Icelandic glacier; what I wanted to mimic.


IMG_7384 IMG_7385 IMG_7386 IMG_7387

Lights changing video

Preserving the Human Element

In 1996, McCullough argued that computers are “inherently a tool for the mind and not for the hands” (McCullough, 7). And, 20 years later, his theory doesn’t deviate far from the truth. While computer technologies have advanced substantially since his article was published, a majority of the work we do using computers still remains an intellectual task.

Currently, I’m in a position where I’m able to interact with new UIs, tools, and applications and I agree with McCullough’s prescient statement. Photoshop for example, is a tool that many graphic artists and designers use to bring their visions to life. However, using a product like Photoshop begins as and remains an intellectual endeavor. The only role hands play during the creation of digital art remains in the clicking and moving of the mouse.

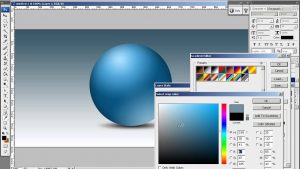
Imagine creating a sphere or a cube using Photoshop. First, you need to create the basic shape. But then, you would need to figure out how to make a 2D object appear to have three dimensions. To do this, you would need to shade the image properly and create perspective using lines or curves to create the 3rd dimension. This entire process is an intellectual pursuit, relying solely on thinking through the problem.

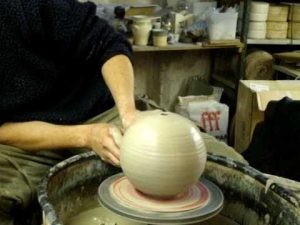
However, if you were using clay to make a sphere, you would be able to feel corners or spikes in the clay and you would round them out by smoothing the edges with your thumb. You would also feel the cool temperature and the slippery personality of the clay and you would be able to feel the roundness and the weight of the shape. Furthermore, you would also be able to feel and guide the formation of the a sphere thereby creating an intimate connection with the piece. This experience of designing with clay or any other physical medium engages one’s senses and creates an emotional connection with the final product.

While digital tools may afford us various advantages like speed, efficiency, and the ability to make changes quickly, there is a sterility in the perfection of the final product. Perhaps the most ironic part about hand-made, tangible products is that their unique characteristics, the ones McCullough wants to preserve, are actually intangible qualities: a human’s touch and a human’s mastery of a skill. As McCullough said, “…hands bring us knowledge of the world. Hands feel. They probe. They practice. They give us sense, as in good common sense…” (McCullough, 1).


Digital Sphere   Sphere by clay

(Photo source: https://i.ytimg.com/vi/nZsMgWnyhf4/maxresdefault.jpg, https://i.ytimg.com/vi/HWvxrzQGtA0/hqdefault.jpg)

Who needs auto-tune when you have an Arduino board and LEDs?

When I learned that this project entailed LEDs, the first thought that came to mind was how I could combine the main task of flashing an LED and relate it to music. Rihanna’s “Disturbia” has a prominent introductory beat that I thought would be the perfect complement to a flashing light. However, rather than using just one light, I chose to program three LEDs to flash at different rates depending on which part of the chorus it was.

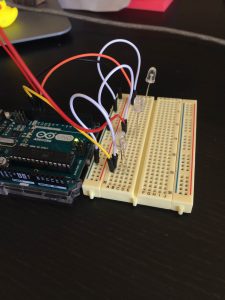
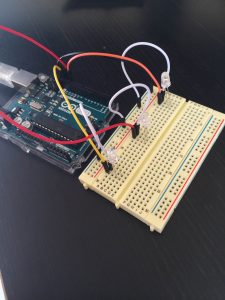
First, I connected one jumper wire from GND on the Arduino board to the negative rail on the breadboard. I then connected three other jumper wires from rows 10-13 on the Arduino board to a positive row on the breadboard. Next, I used the remaining three jumper wires to act as resistors for the wires connected to the Arduino board by connecting one end to the negative rail and the other end above the other wire on the breadboard (view photos for clarification). Finally, I connected the LEDs to the breadboard by putting the positive side (longer leg) below the wire connected to the Arduino board and I put the negative side (shorter leg) under the port that connects the negative rail. Now, the physical components of my board were ready. The final step was to write code that would make the lights flash to the beat of the song. After using code provided by Arduino and tweaking the HIGH and LOW voltage levels for each light, I was able to create a light show that corresponded to Rihanna’s “Disturbia”.

Components used:

  • 1 Arduino Uno
  • 1 Breadboard
  • 3 LEDs
  • 7 jumper wires
  • 1 USB cable

Code:
int ledgreen = 13; //(green)
int ledblue = 12; //(blue)
int ledred = 11; //(red)

// the setup routine runs once when you press reset:
void setup()
{
// initialize the digital pin as an output.
pinMode(ledgreen, OUTPUT);
pinMode(ledblue, OUTPUT);
pinMode(ledred, OUTPUT);
}

// the loop routine runs over and over again forever:
void loop()
{
digitalWrite(ledgreen, HIGH); // turn the LED on (HIGH is the voltage level)
delay(240); // wait for a second
digitalWrite(ledgreen, LOW); // turn the LED off by making the voltage LOW
delay(240);
digitalWrite(ledgreen, HIGH); // turn the LED on (HIGH is the voltage level)
delay(240); // wait for a second
digitalWrite(ledgreen, LOW); // turn the LED off by making the voltage LOW
delay(240);
digitalWrite(ledblue, HIGH);
delay(150);
digitalWrite(ledblue, LOW);
delay(225);
digitalWrite(ledred, HIGH);
delay(100);
digitalWrite(ledred, LOW);
delay(250);
digitalWrite(ledblue, HIGH);
delay(250);
digitalWrite(ledblue, LOW);
delay(250);
digitalWrite(ledblue, HIGH);
delay(250);
digitalWrite(ledblue, LOW);
delay(250);
digitalWrite(ledred, HIGH);
delay(200);
digitalWrite(ledred, LOW);
delay(150);
digitalWrite(ledblue, HIGH);
delay(250);
digitalWrite(ledblue, LOW);
delay(175);
digitalWrite(ledred, HIGH);
delay(200);
digitalWrite(ledred, LOW);
delay(225);

}

Arduino Arduino 2

Designing for Better Experiences

The constant grind of daily commutes, travel, and transportation are only made worse by high costs, low taxi/train/bus frequencies, unreliable time estimates, and unexpected delays. Luckily, over the last several years, Uber has worked to create a product that eliminates this frustrating experience from many of our lives. According to activity theory, “the ultimate cause behind human activities is needs”, (Victor Kaptelinin and Bonnie A. Nardi, Acting with Technology). In fact, the idea for Uber was born when its founders, Travis Kalanick and Garrett Camp, had trouble hailing a cab in Paris. They identified a need and built a product to solve a problem which they predicted wasn’t uniquely their own.

Transitioning to anything new takes time, creates emotions we typically don’t like and many times, this discomfort causes us to fall back on our more familiar but outdated methods. However, it’s our need to alleviate this discomfort that motivates us to find a new solution. And, when we find that solution, “When a need meets its object…[it’s] a ‘moment of extraordinary importance’” (Victor Kaptelinin and Bonnie A. Nardi, Acting with Technology). It is this very moment, this moment of importance, when a person with a need recognizes how to direct their efforts; that is, they know how they want to solve their problem. In the case of Uber, that cold, winter night in Paris pointed both Kalanick and Camp to find a solution for their ride-hailing problem.

Users of the Uber app are looking for an easy, seamless experience. Not only do they want an affordable, reliable, and comfortable form of transportation, but they also want their digital experience to be just as pleasant. That’s why the Uber team invested heavily in the app’s “Tangible Bits”. Coined by Hiroshi Ishii and his team, the term “Tangible Bits,” refers to “…a direct focus on the interface between the physical and virtual worlds,” Paul Dourish, Where The Action Is. As a result, the app’s UI has been designed to be an intuitive and easy experience.

Visually, the landing page achieves the delicate balance of prominently displaying important information without cluttering the screen. What’s most important to the user is being able to mark their exact pick-up location, knowing how much they’ll have to pay, and how quickly their ride will be there to pick them up. The app also takes what comes most naturally to us, language and communication, and combines them with human interaction and visual symbols to create a more intuitive experience. Within the app, the map, arguably one of the most important parts of this application and a very familiar symbol to most people, takes up nearly the entire screen. Our intuitive nature in understanding and using maps makes the adoption of the digital version faster and more powerful. As a result, the user’s learning curve isn’t steep and they’re able to quickly understand the product’s key features, resulting in higher usage and fewer frustrations.

The early Uber team identified a need that hadn’t been met and used that experience and discomfort to create a solution. However, they also recognized that just meeting a need doesn’t necessarily correlate to a positive outcome. As a result, by focusing their design on the human’s interaction with their app, Uber successfully created an intuitive (read: comfortable, familiar) experience for the user. By addressing these design protocols early, Uber was able to create an app that was clean, simple, and easy to adopt.