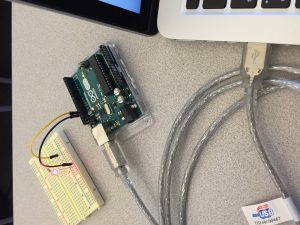
Components:
- 1 Arduino
- 1 Breadboard
- 1 LED
- 1 Resistor (220 ohm)
- 2 Jumper wires
- 1 USB cable
- 1 Macbook pro
Description:
I changed the code of the Blink example so that the red LED lights up for 3 seconds and turn off for 2 seconds on a loop. I connected the Arduino to my laptop and uploaded the code to it. I attached the breadboard with the jumper wires along with the resistor and LED. I then checked that it worked and took a picture (below).
Code:
void setup() {
 // initialize digital pin 13 as an output.
 pinMode(13, OUTPUT);
}

// the loop function runs over and over again forever
void loop() {
 digitalWrite(13, HIGH); // turn the LED on (HIGH is the voltage level)
 delay(3000); // wait for 3 seconds
 digitalWrite(13, LOW); // turn the LED off by making the voltage LOW
 delay(2000); // wait for 2 seconds
}