
Description
I used Arduino with three LED lights. I have used the red, the blue and the green LED lights. I have placed the blue and red on the left side of the breadboard and placed the green on the right side of the breadboard. To achieve this, I have used two grounds and two different pins (pin 13 and pin 0). The blue and red lights will turn on for one second and turn off for .5 second, then the green LED will turn on for 2 seconds and turn off for .5 seconds. The loop will restart after green LED turns off. I have uploaded the code to ensure the timing is right. Use the black wires for grounds and the orange wires for the rest of the pins. I have also used three resistors, each LED light uses one.
Components
- 1 Arduino
- 3 LED (Red, Blue, Green)
- 3 Resistor (220Ω)
- 1 Breadboard
- 2 black wires for ground
- 5 orange wires for the inputs
Code
int pin = 13;
int pin0 = 0;
void setup() {
// setting up the two pins
pinMode(pin, OUTPUT);
pinMode(pin0, OUTPUT);
}
void loop() {
// light up for 1 sec
digitalWrite(pin, HIGH); //0 VOLTS OR 5
delay(1000);
digitalWrite(pin, LOW);
// turn off for .5 sec
delay(500);
digitalWrite(pin0, HIGH); //0 VOLTS OR 5
// light up for 2 sec
delay(2000);
digitalWrite(pin0, LOW);
// turn off for .5 sec
delay(500);
}
Photo
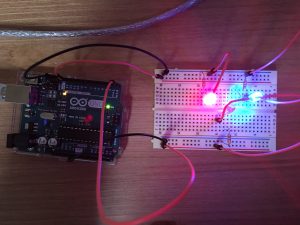
Both Red and Blue lights turning on
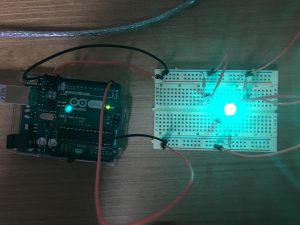
Green LED lights on
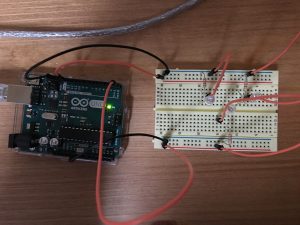
All lights off